When to Plant Ranunculus Corms: Tips For Your Zone
Ranunculi are unique and beautiful spring bloomers that make excellent cut flowers and look wonderful in the garden. Join gardening expert Melissa Strauss to discuss how to plant and tend to these tender perennials.

Contents
I started growing ranunculus plants in my cutting garden a few years ago, and while I experienced some ups and downs, they quickly became a favorite. These relatives of buttercups make a stunning addition to floral arrangements, and their pretty foliage is cold-tolerant and looks lovely in the garden.
Ranunculus are tender perennials that are native to warm climates. They prefer an interesting combination of conditions. While they won’t survive the winter north of zone 8, they are cool weather lovers, and they’re also surprisingly frost proof. They have a certain sweet spot between seasons that makes it possible to plant them in cooler climates that have a long, cool spring season.
While they can be a bit particular about their conditions, once you get the hang of it, they aren’t difficult to grow. Follow along and I will give you some tips for growing these lovely flowers in your zone.
Timing in Zones 8-10

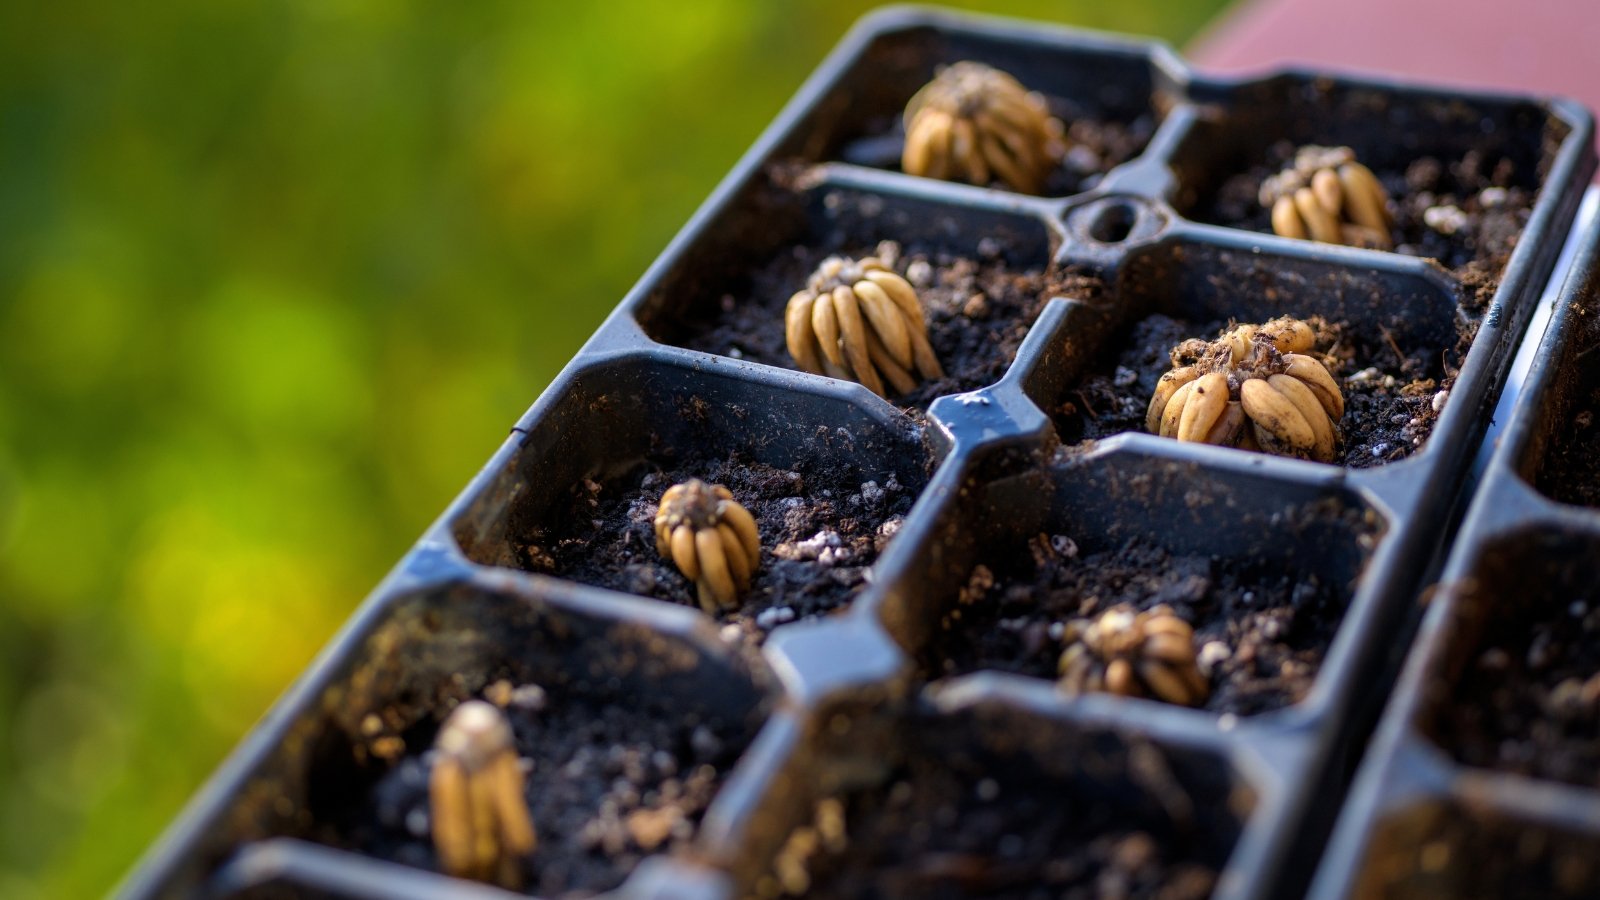
Since ranunculus are perennials in zones 8-10, this is where they are easiest to grow. In zone 8, they may need a bit of extra protection in winter, but in general, these zones remain warm enough to sustain the corms over the colder months. Corms are the tiny clusters of tubers that ranunculus grows from. They are similar to Dahlia tubers but much smaller.
In these warm climates, fall is the ideal time for planting your corms. If you plant in October and November, typically, they will sprout and begin to grow some roots and green growth before the first frost date. If they don’t come up before it gets cold, don’t worry. In my experience, some do and others wait for late winter to early spring.
Once the temperature begins consistently dropping to the mid-30s (~0°C) at night, their growth will slow. They will remain fairly small through the winter months. Then, as soon as temperatures rise consistently back into the mid to high 30s at night, they will resume.
In zone 10, they will typically grow throughout the winter and begin to bloom in late winter. Here in zone 9, my ranunculus plants start to pick up speed in February, and by mid-March, I am seeing the first buds start to mature. In zone 8, it’s wise to cover your corms with a thick layer of mulch to help insulate them in the even of prolonged cold snaps.
Their frost tolerance is an interesting part of their nature, as there are few plants that are so frost-proof but don’t survive the winter in colder climates. Essentially, the foliage is about as cold hardy as the roots. I find them similar to snapdragons in this way, and I plant them both at the same time. They tend to bloom at the same time, as well, though snapdragons bloom farther into the summer. Ranunculus will stop blooming once the daytime temperatures rise consistently above 70°F (21°C).
As the weather warms up, these perennials will die back to the ground, going dormant for the summer, and returning again in late fall. You can leave them in the ground all year, and simply cut off the foliage after it turns yellow and wilts.
Timing in Zones 4-7

In these cooler zones, your ranunculus corms won’t survive the winter in the ground. They like cold weather, but an extended time spent below 23°F (-5°C) will damage or kill them. A gardener in zone 4 won’t plant at the same time as one in zone 7, but they have the time of year in common. In these climates, you’ll want to plant your corms in late winter to early spring.
The tricky part of growing in cooler climates is finding the sweet spot where night-time temperatures are still falling into the high 20s and low 30s (between -7 and 0°C). But if you plant them too soon, and have an unexpected temperature drop with prolonged exposure to temperatures in the low 20s and your corms will freeze. When they freeze and thaw, they will ultimately rot, and that’s not good.
Time your planting so that you are past the threat of a hard freeze, but before your last frost date. This will protect them from freezing and rotting, and it will give them plenty of cool weather to flourish and bloom before summer. This typically falls somewhere between March and May.
Soaking Your Corms

Before planting, it’s helpful to soak your corms. This helps to speed up the germination time, and they will sprout sooner. The most important factor when you soak them is time. Because they are corms and not seeds, you don’t want to soak them for very long, or they will rot.
Soak your corms in room temperature to slightly warm water for about three to four hours. You don’t need to add anything to the water, just make sure it’s clean. Change out the water each hour to maintain oxygenation. Don’t use hot water as this can cause damage.
Pre-Sprouting

Pre-sprouting is something that many gardeners do with their corms to get a head start on the season. I personally skip this step, because in my climate (zone 9) it’s not necessary, and I grow them as perennials. In cooler climates, pre-sprouting gives you an earlier start and strong plants to put in the garden that will tolerate a little extra cold weather.
In zones 4-7, after you soak your corms, place them in a tray on top of moist but not wet potting soil. Cover them with additional moist potting mix and store them in a cool, dark location. Leave them for about two weeks. At that time they should have some small, white roots developing.
At this point they are ready to go in the ground. Pre-sprouting is useful for finding out which corms are healthy and viable and which are duds. Hopefully, most of them will be viable, but if they don’t grow any roots during this time, it’s pointless to plant them. This is valuable in terms of the look of the garden, as there will be no gaps where duds didn’t sprout.
Planting Orientation and Depth

Ranunculus prefers a location that receives full sun exposure, at least six hours daily. In warmer climates, choose a spot that gets some shade in the afternoon, as this will prolong their bloom time. Make sure they have good drainage. They prefer soil that is a mix of loam and sand with a slightly acidic pH. Adding in some compost at the time of planting will increase the nutrients in the soil and improve drainage.
At planting time, the most important factor is the orientation of your corms. Dig down about three inches and set them in the hole with the fingers pointing down. When you look at the corms, this description should make sense. The small tubers connect at one end, this is where the foliage will grow from. The other end of the tubers aren’t connected, and they look like tiny fingers.
Plant about six to nine inches apart. Gently cover them up with soil and water them lightly. Don’t overwater, as they are susceptible to root rot. The soil should be moist, not wet.
Watering

If you live in a warm climate and plant in the fall, you’ll need to water them occasionally to get them to sprout. Just make sure you don’t overdo it. Once they sprout, they can handle a bit more water. However, once they stop growing from the cold, they need little water. Resume watering when they start to grow again in late winter.
If you live in a cool climate and plant in the spring, water them lightly every two to three days unless you get rainfall to make up for it. Essentially the soil should remain slightly moist, never soggy. I water my plants about once every three days unless it rains. Let the soil drain and nearly dry between waterings.

Cutting

The secret to getting your ranunculus to produce the greatest number of flowers is to cut them regularly. If you’re leaving them in the garden as ornamentals, deadhead the spent blooms after they fade. Cut the stems as far down as possible without removing any other buds that may be branching off of the main stem.
If you’re growing these as cut flowers, which I highly recommend, it’s important to cut them at the right time. Ranunculus are among the flowers that will continue to open when you cut them in the bud. However, if you cut them too soon, they may fail.
The ideal time to cut them is when they reach what we call the marshmallow stage. This is when the color of the flower is visible, and the bud is plump, but still closed. We call it the marshmallow stage because when you gently squeeze the sides of the bud, it should have some give and be fluffy, like a marshmallow.
The more you cut, the more flowers these will produce. One plant can produce anywhere from five to 15 flower stems.
Post-Season Care

As the weather warms up, your ranunculus plants will stop growing and producing. This happens when the daytime temperatures are consistently above 70°F (21°C). Gradually, the foliage will begin to fade. It will ultimately turn yellow and go limp. Avoid interfering with this process, as they will draw any excess nutrients and energy back into the ground to produce new corms for next year.
In warm climates, wait until the foliage has died back and snip it off at the soil level. Then, cover them with a layer of mulch and leave them alone until the cool fall weather brings them back. Every two to three years, you’ll want to dig them up and separate them to keep them from becoming crowded.
In cool climates, wait until the foliage dies back and gently dig up your corms. Rinse them in clean, room-temperature water, working as much of the soil out from between the tubers as possible. Allow them to dry completely; this may take a few days. Then, store them in a paper bag or other breathable container in a cool, dark space until next year. The nice thing about ranunculus corms is that they store well, and you shouldn’t have any problem getting them growing again the following year.
A note to warm climate gardeners: Because of how easily they rot, I dig up my corms in the summer, even though technically, I don’t have to. I live in a humid climate with heavy rain in early fall, and I feel safer not leaving them in the ground for that. I do leave my corms that are in raised beds to stay for the summer, as the raised beds have excellent drainage.


