8 Potato-Growing Hacks for the Best Harvest
These hacks help you harvest the most potatoes possible! They’ll guide you to your biggest yields whether you garden in raised beds, containers, or on acres of farmland. Discover these nine potato-growing tips from Epic Gardening founder Kevin Espiritu and potato farmer Tyler Heppell.


Contents
Potatoes are cheap at the grocery store, but nothing compares to the flavor of homegrown ones. Creamy, decadent, and thin-skinned, fresh potatoes are a delicacy that few people enjoy. Though growing the roots appears straightforward, some simple methods ensure you grow tender tubers with few cultivation issues.
Take it from us—potato farmer Tyler Heppell, or Potato Ty, grows the tubers on his family’s farm in Canada. Tyler and his family have been cultivating the crops for over five generations, and they’re experts in their field.
Epic Gardening founder Kevin Espiritu survived off crops like taters for 30 days! He uses his many years of experience to grow epic harvests. Potatoes are one of the many crops he cultivates annually in his San Diego garden.
In this article and video, Kevin and Tyler share expert potato-growing hacks. Grab your tubers and join me for a peek underground to see how these plants grow best!
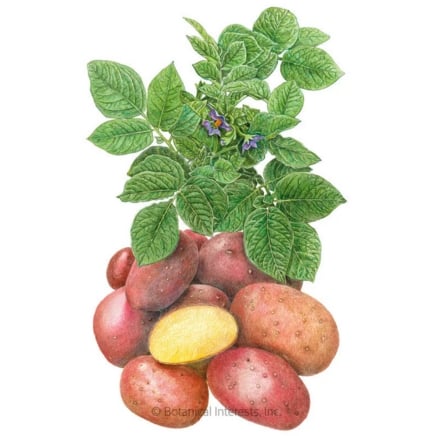
Choose Your Variety Wisely

This potato-growing hack comes from Tyler. He and his family discovered that yellow potato varieties have the largest yields. They’re also good for long-term storage, lasting many weeks in the pantry. According to his yields at Heppell’s Potatoes, a yellow variety produces 70,000 lbs. per acre, while other varieties may only grow between 30,000 to 40,000 lbs. per acre.
Whether your garden is an acre or an eighth of an acre, choosing the best variety ensures you get the most bang for your buck. Why grow poorly producing types when you can have dozens of tubers come harvest time?
Tyler recommends trying ‘Agata’ if you’re a beginner grower. This variety produces many tubers per seed potato, giving you significant harvests in small spaces. It also stores well in a cool, dark place indoors. Other well-performing yellow types are ‘Yukon Gold’ or ‘Yellow Finn.’ Choose whichever type you enjoy eating the most.
Like tomatoes, taters have two types: indeterminate and determinate. It makes sense, as both crops are from the same plant family, the nightshade family Solanaceae.
Similarly to tomatoes, determinate taters grow over a short period, producing their crop all at once. Their typical harvest period from planting is 80 days. You’ll harvest most of the crop in one location near the tater you planted. Indeterminate varieties grow much longer, needing 90 to 120 days to mature fully. They sprout new taters far from the original seed.
‘Yukon Gold’ is a determinate variety that’s yellow-skinned. It’s perfect for beginner growers or those with short growing periods. ‘Russet Burbank’ is an indeterminate type perfect for growers with long, mild summers.
The Ruth Stout Method

Lazy gardeners rejoice! The Ruth Stout method is perfect for you. It comes from Ruth Stout, a gardener and author best known for her lazy gardening methods. She wanted to make gardening easier for everyone.
Her potato-growing hack is as easy as can be. Simply place a seed tater on the ground, layer straw on top, and ensure it stays moist. The crops will sprout in the hay, growing in the airy mix aboveground. To harvest, brush the hay away and pull the tubers out once they reach a harvestable size.
Epic Gardening’s garden hermit Jacques Lyakov used this method and found success! You’ll have similar victories if you prefer lazy gardening. For best results, use a layer of straw two to three feet thick and ensure the site stays moist throughout the growing season.
Add Row Cover

A row cover works like a mini-greenhouse. Instead of plastic, it’s cloth. The cloth insulates the plants, trapping warm air inside and keeping cold air out. Simply drape it over the beds and weigh down the edges at planting.
Because it’s cloth, the row cover doesn’t need support. It’s lightweight and won’t damage the tender crops that lie underneath. If your plants have significant top growth and you want to practice extra care, you may lift the cover with supports. PVC, hoop house frames, and bamboo stakes work well as supports.
Tyler uses this potato-growing hack on his family farm, and he says they harvest weeks before most other growers! The cloth cover extends the growing season, working in early spring and late fall to protect your crops from sporadic frosts. With this hack, you’ll have ready tubers in as little as 80 days!
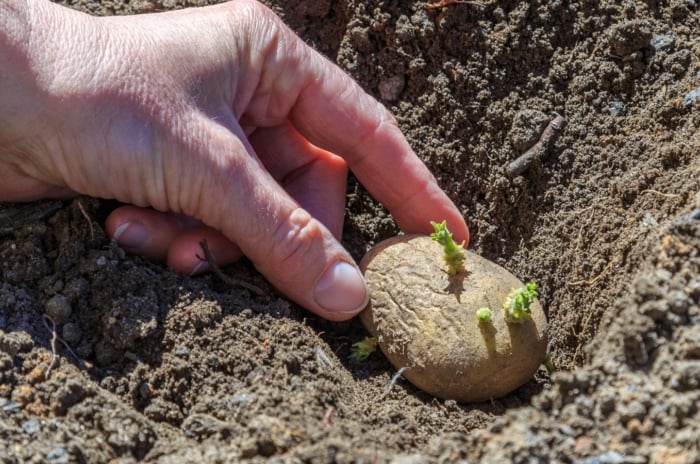
Chit Your Potatoes

Chitting is a weird word! Though odd, it represents an essential part of growing tuberous vegetables. You may have seen chitted potatoes in your pantry. As the taters prepare to grow, they sprout white or green shoots out of the “eyes” on their skin. “Eyes” refer to the dimples where new shoots grow.
These veggies will still grow from un-chitted roots, though they’ll take much longer to sprout. Always use chitted seed tubers to ensure a quick and easy turnaround. Grocery store taters may chit on their own after a while, though some growers spray them with anti-sprouting agents. For best results, use disease-free seed potatoes from a reputable source.
If the roots struggle to grow new shoots, you can encourage them to chit with an easy method from E.G. founder Kevin Espiritu. Place them in a tray with holes on the bottom, then place the tray indoors under bright, indirect sunlight. New shoots should sprout after a few days!
Cut Tubers in Half Before Planting

Not all tubers grow the same way! Smaller sizes are better for planting, as they grant higher yields than large roots come harvest time. The ideal size for planting is three ounces. So, what do you do with larger ones?
Cut them in half! Though it may seem extreme, a simple cut can turn one root into two roots. Remember the eyes from before? You want each piece to have one chitted eye with shoots growing out. Using a sharp knife, cut the roots so they separate into multiple pieces.
Let the cuts dry and scab for a few days, then plant the taters so their shoots are pointing upward. Cover them loosely with dirt, then water well so they’re moist but not soggy.
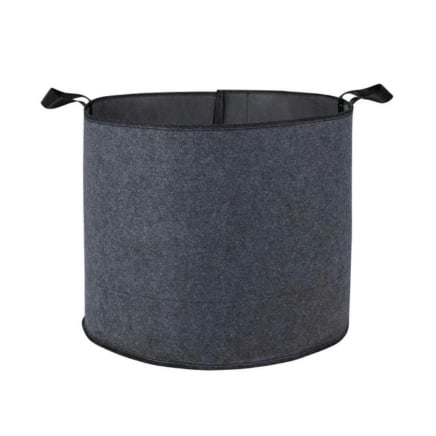
The Bucket Method

You don’t need fancy containers for this vegetable. A simple bucket will do! With a five-gallon bucket, you can sprout dozens of potatoes. Start by drilling holes in the bottom for drainage. Place a thin layer of loose, fertile potting soil at the bottom, then put your seed inside. Place more soil on top, water well, and wait for sprouts to appear.
As the plants grow, you’ll add more potting soil to cover the roots. You should have a full bucket by fall! This method works best with indeterminate types that spread over long periods. E.G. founder Kevin likes using buckets because they’re easy to use and cheap to make.
No matter what variety you’re growing, using a container permits easy harvesting. Dump the pot when the season’s over, and ripe potatoes will come tumbling out. Grow bags, plastic containers, and clay pots are excellent substitutes for five-gallon buckets.
Let Skin Set

Skin set helps the roots store well for long periods. It refers to the thickness and quality of a potato’s skin. The skin prevents bacteria, fungi, and other diseases from coming in. It also locks moisture inside, allowing the potato to survive extended amounts of time without soil, water, or dirt.
For a proper skin set, let the fleshy green parts growing aboveground turn brown before harvesting. They’ll wither and die as the roots suck nutrients for swelling and skin setting. Depending on your climate, this process may take weeks or months.
Speed up the skin setting with a fun hack—cutting down your plants! As they begin turning yellow, slice them off at their base. Compost the clippings, then wait two to four weeks before pulling your crop from the ground. You may pull them earlier for fresh eating; early harvests last a few days in storage rather than weeks.
Cover Crop in the Off Seasons

Cover cropping is an underrated potato-growing hack—it boosts soil health, improves plant yields, and traps carbon from our atmosphere! Instead of leaving the ground bare after harvesting, you’ll plant seeds of plants like hairy vetch, fava beans, or winter rye.
Cover cropping works in the same manner as mulch does; a thick top layer protects the soil underneath. Instead of using compost or leaf mold, you use living plants to cover the ground. Their roots lock onto soil particles, creating a cushy home for beneficial bacteria, fungi, and archaea.
A few weeks before planting is the time to cut the cover crop down in preparation for your main crop. You may lightly rake in the cut plants, move them to your compost, or till them. After some time, the dead cover crops decay into fluffy humus, perfect for growing tubers.