How to Rejuvenate an Overgrown Hedge: 7 Pruning Tips
Maybe you inherited an old home or forgot about the evergreen hedge in the backyard. No matter your struggle, this guide will help you renovate and rejuvenate your overgrown hedges. Seasoned grower Jerad Bryant shares seven expert pruning tips to guide you through the process.


Contents
Whether your hedges are 10, 20, or 30 feet tall, there are many beginner-friendly pruning tips to reduce their height and width so they match your garden’s aesthetics. Rank, overgrown shrubs are unattractive and structural messes! They often have curling or crisscrossing branches that are prone to breaking under snow or ice.
Continuous shearing is the best hedge care. With a few shearings a year during the growing season, you’ll keep your plants growing in the shapes you’d like them to. Sometimes, continuous shearing isn’t possible, or a previous owner kept the plants taller than you’d prefer. With rejuvenation and renovation, you can start over with the same plants!
Instead of planting new shrubs, you’ll tackle the old ones with loppers and chainsaws to give them new life. Though pruning seems harmful, it’s a highly effective way to keep woody perennials happy, healthy, and structurally sound.
We’ll discuss which plants take well to these methods and how to complete them. Without further ado, here are seven pruning tips for renovating overgrown hedges.


Study Your Hedge

Knowing the plants you’re growing is extremely helpful. You can start making pruning decisions once you know what species they are, how they grow, and whether they’re evergreen or deciduous. Many deciduous species take well to harsh pruning styles like coppicing and renovating.
These deciduous shrubs handle extreme pruning well, rebounding in no time:
- Crab Apple (Malus spp.)
- Mock Orange (Philadelphus spp.)
- Forsythia (Forsythia spp.)
- Butterfly Bush (Buddleja spp.)
- Blackhaw (Viburnum prunifolium)
- Lilac (Syringa spp.)
- Cotoneaster (Cotoneaster spp.)
- Flowering Quince (Chaenomeles spp.)
- Firethorn (Pyracantha spp.)
- Hawthorn (Crataegus spp.)
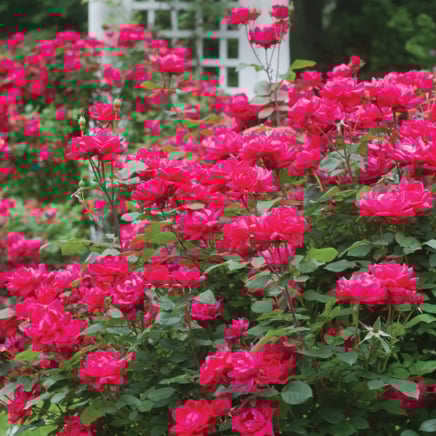
- Rose (Rosa spp.)
These evergreen species rebound from shearing or severe pruning:
- Cherry Laurel (Prunus laurocerasus)
- Glossy Abelia (Abelia x grandiflora)
- American Holly (Ilex opaca)
- Boxwood (Buxus spp.)
- Yew (Taxus spp.)
- Pittosporum (Pittosporum spp.)
- Japanese Yew (Podocarpus spp.)
- Oregon Grape (Berberis aquifolium)
The best time to restart a hedge is late winter through early spring. Though you’ll sacrifice the blooms of some flowering species, you’ll ensure they grow well for the rest of their lives. A sacrifice this season will ensure proper growth for decades!
Know When to Start Over

Sometimes, the best pruning tip is actually to remove the overgrown hedges and plant new ones. Though this is the last thing you likely want to do, it’s necessary for evergreen species that don’t sprout new growth on old wood. When you prune into them, you create dead zones where no new growth emerges; they’ll look bare for years!
These evergreen species cannot be renovated or rejuvenated; they require consistent shearing to look their best:
- Juniper (Juniperus spp.)
- Pine (Pinus spp.)
- Arborvitae (Thuja occidentalis)
- Spruce (Picea spp.)
- Fir (Abies spp.)
- False Cypress (Chamaecyparis spp.)
Remove these overgrown specimens and plant new ones instead of renovating, rejuvenating, or coppicing them. You may select large plants so they fill in immediately; just know that the larger the new plants are, the more expensive they’ll be.
Select the Right Tools

Before we begin, we must select the proper tools! Three pruning tools are handy for the job: hand pruners, loppers, and handsaws. Cut small stems and branches with hand pruners, large branches with loppers, and limbs with handsaws.
Gigantic hedges may require powerful tools! Chainsaws are beneficial for large, thick limbs. Though handsaws can cut through large trunks, the process will take a long time. Using a chainsaw cuts the labor time, though it requires careful usage and safety gear like goggles, gloves, and ear plugs. Similarly, a hedge trimmer is a great tool for shaping shrubs in a short amount of time.
Before pruning, it’s important to sanitize and sharpen the tools. This ensures you don’t spread diseases from plant to plant, keeping your garden healthy and sanitary. Sharpening helps you make even, clean cuts that heal quickly.
Start With 3 Ds

The first cuts to make are the easiest. Target the three Ds: dead, damaged, or diseased wood. This first tip is key to quick, easy hedge pruning. You’ll know branches are dead when they’re brown under the cambium, or the underlying layer beneath the bark. They’re alive if they’re green underneath. Dead limbs lack buds and new growth, while live ones sprout new growth.
Diseased wood may have bacterial ooze or signs of fungal infections. You’ll notice orange slime coming from bacterial infections and cankers. White, orange, and brown mushroom caps, shelves, or strands may be visible on fungal infections. Remove all wood with these symptoms. If the symptoms are on the main trunk, you’ll have to remove the plant and start again with a new one.
Damaged wood includes partially fractured limbs, snapped twigs, and branches with open wounds. Removing as many infection sites as possible will help create a healthy and resilient hedge in your yard.
Choose a Method

After removing the deadwood, you have the choice between rejuvenation or renovation. Which method works best depends on the plant species, how fast you want regrowth, and how old the plants are. There is no right or wrong choice, though there are some reasons for choosing one instead of the other.
Rejuvenation is a slower, three-year process that works well for large, overgrown hedges with informal structures. You’ll remove a portion of the plants each year and give them extra mulch and care to help them recuperate. After three years, you’ll have a lovely, well-shaped garden hedge.
Renovation is more extreme than rejuvenation; it involves coppicing, or cutting the entire plant to within inches of the ground. Though extreme, this method works well on vigorous growers that recover within a season or two.
Rejuvenate the Hedge

Start hedge rejuvenation pruning in late winter or early spring. Select a few robust young trunks to leave in place. Remove around a third of the oldest, thickest trunks and leave the ones you chose behind. Mulch the site heavily, adding compost, wood chips, or similar organic mulches to cover the shrubs’ roots.
In the second year, choose a few more of the strongest, thickest trunks to remove. Also, prune a few new, thin stems that grew last year. You may begin to see the eventual shape of the hedge this year. Keep a few strong and healthy stems to remain. Add compost or a similar mulch and water well throughout the growing season.
In the third year, remove all old stems and keep the few young, vigorous ones that remain. Let them grow to the size you want, then shear their leaves continuously to keep the hedge’s shape.
This method works best for flowering species like butterfly bushes, lilacs, and cotoneaster, though it works well on many other evergreen and deciduous plants. Avoid rejuvenating conifers that don’t sprout on old wood; you’ll want to remove them and plant new ones.
Renovate the Hedge

Renovation works well for vigorous, quick-growing plants that you may begin shaping a year or two after severely pruning them. Plants like hollies, laurels, and privets are ideal for renovation, though you can do it on lilacs and other flowering specimens. Avoid renovating slow-growing types like boxwoods and yews, as they’ll take many seasons to recover, and you’ll have a spotty hedge!
To renovate, cut the hedges to within four and six inches of the ground in late winter or early spring. Once they reach the desired size, begin shearing new shoots in late spring or summer. When shaping, make a slightly wider base than the top; this ensures even growth, as a vertical edge leads to weak, twiggy undergrowth.
After renovation, cover the root zone with a two to three-inch thick layer of organic mulch. Ensure the soil stays evenly moist throughout the growing season, and your hedges will recover in no time!


