Why and How to Winter Prune Fruit Trees
When is best to prune fruit trees, and how do you do it? Late winter pruning is ideal; it encourages healthy growth without harming your trees. Learn why, how, and when to prune your fruit trees with this easy-to-follow guide from backyard orchardist Jerad Bryant.


Contents
Winter pruning seems deadly for fruit trees. Wouldn’t you want to prune them when they’re actively growing? Though this seems ideal, pruning during the growing season invites pests and diseases into the cut wounds. It’s better to prune woody fruiting species in late winter when they’re still dormant.
Some fruiting species, like citrus and avocados, are evergreen and require little pruning. Leave these specimens alone during winter, and focus your efforts on deciduous species that lose their leaves.
Whether growing apples, pears, pluots, or peaches, this guide takes you step by step through the pruning process. You’ll create an ideal tree shape that supports heavy fruits as they develop. Pruning fruiting species differs from pruning ornamental ones, as you shape them for function rather than beauty.


Why Prune During the Winter?

Winter is different for gardeners depending on where they live. If you live in mild regions of the Pacific Northwest, winter ends a lot sooner than it does on the East Coast. You’ll start making cuts in February, while East Coast growers may wait until March.
It’s best to prune during late winter and early spring before the trees’ buds open up. Dormancy is key; it prevents sap from flowing excessively out of the wounds. Prune too early and you’ll create open wounds for diseases, but prune too late and conditions like fire blight or pest infestations may occur.
For most growers, the time to make cuts falls between January and March. Since the branches lack leaves, you can easily inspect the trees’ structures and make appropriate cuts.
These are the common reasons for pruning fruit trees during winter:
- To repair overgrown trees
- To increase light levels and air circulation
- To encourage prolific yields
- To create strong branches that support fruit
- To shorten a tall tree’s height
- To maintain a healthy specimen
How to Winter Prune Fruit Trees

Now that we know why and when to prune fruiting woody species, let’s learn how to prune them! Grab your tools, put on some gloves and a coat, and take a good look at your trees. We’ll make smart cuts that boost your specimens’ health, productiveness, and beauty.
Step 1: Gather Tools

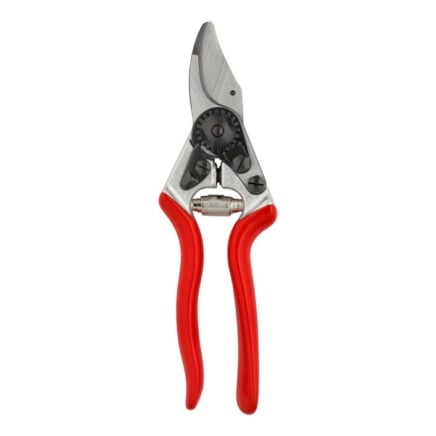
You’ll need some tools to get the job done. Hand pruners work well on dwarf varieties, while loppers or handsaws may be necessary for thick branches. Here’s a complete list of all the materials you’ll need:
- Hand pruners
- Handsaw
- Loppers
- Gloves
- Protective glasses or goggles
Before using old pruners, ensure they’re sharp, clean, and sterile. Clean and sterilize the blades with rubbing alcohol, then apply lubricating oil to help them open and close easily. Sterilizing the blades prevents diseases from spreading in your orchard.
Step 2: Inspect Your Trees

With all the tools at the ready, it’s time to inspect your trees. Three main pruning styles—the central leader, the modified central leader, and the open center—help home growers create strong, healthy specimens that hold fruit well.
Which style is right for you and your orchard depends on the fruit, the climate, and harvesting preferences. Some gardeners don’t mind climbing a ladder to harvest, while others prefer having all their fruit within reach.
| Style | Suitable Species | Why This Method? |
| Central Leader | Apples Cherries Pears Persimmons Plums | A single strong trunk allows for many side branches that bear loads of fruit. This method is best for dwarf and semi-dwarf species. |
| Modified Central Leader | Apples Apricots Cherries Pears Persimmons Plums | Most fruiting species grow like this naturally. It creates thick lower branches that bear fruit well. This method is best for standard, dwarf, and semi-dwarf trees. |
| Open Center | Almonds Crab Apples Figs Nectarines Peaches Quince | This style allows for more light and air to reach the center of the true, leading to higher yields come harvest time. This method may create weak limbs when done incorrectly. |
Step 3: Remove Dead and Diseased Wood

The first cuts to make are the easiest. They have nothing to do with the shape you’re trying to achieve. Simply find dead or diseased branches and remove them from your specimens. Removing the dead wood lets you look closely at your fruiting specimens. This helps you make smart pruning decisions.
To prune, remove branches from the trees by cutting them off a little above the branch collars. Branch collars are the bulging regions at the base of twigs and stems where they connect to larger branches. Make cuts at an angle above the branch collar. Wounds heal quickly here, as this region contains many plant hormones conducive to healthy healing.
Step 4: Prune Suckers and Water Sprouts

Suckers and water sprouts take energy away from your precious fruits. Rather than growing bushels of fruit, your tree may sprout thousands of leaves! Removing suckers and water sprouts now allows your woody specimens to redirect their energy towards flowering and fruiting.
Suckers are tall, straight stems that grow from below the soil. They often sprout around established trunks. Prune them as low as possible to prevent them from growing woody. If you remove them annually, you’ll maintain your tree’s single-trunk shape.
Water sprouts are straight stems that grow from the base and upper branches. They’re often a response to excessive pruning from the year before; the tree sends up lots of vegetative growth to compensate for its loss of resources.
Prevent water sprouts by removing no more than one-third of your tree at a time. You may remove them by snipping them off at their base, leaving clean cuts in their wake.
Step 5: Identify the Leader

As you’re walking around your woody species, look to see where their leaders are. The leaders are the upright central stems that grow tallest near the middle. Multi-trunk specimens have two or more leaders, while single-trunk ones have one in the middle.
You want to leave the leaders alone until your tree establishes itself. Cutting off leaders early may invite fungal and bacterial diseases to infect the top of the tree. You may safely snip the tops of thin leaders on mature specimens to limit their height.
Snipping tall leaders leads to more fruit production, as you let sunlight and air into the tree’s center. The only time to fully remove them is when they compete for energy. Limit multi-trunk types to two or three leaders, and maintain a single leader on single-trunk specimens.
Step 6: Choose Supporting Branches

Off the leader or leaders sprout secondary branches that support flowers and fruits. Some trees flower on old wood while others bloom on new wood. Most produce flowers and fruits from last year’s growth, though some like peaches and nectarines can bloom on new wood. Avoid cutting old wood excessively, as you may chop your future harvest off.
Supporting branches should develop off the trunk at a 60° angle to support future harvests without breaking. Remove downward-sloping or crisscrossing branches, leaving a few strong ones that curve upright. Ensure some old wood or spurs remain for proper flowering and fruit set.
When choosing supporting branches, grant them space between each other to make room for future harvests. Leaving gaps between the secondary branches also lets air and light into the tree to help fruit ripen.
Step 7: Avoid Excessive Cuts

Late winter pruning, when excessive, can cause water sprouts and suckers to form throughout the growing season. Avoid removing more than a third of a tree at a time, and leave some upward-curving limbs alone. The more upright stems you remove, the more upright stems the tree will grow in response.
If upright shoots grow in excess during spring and summer, you may remove them before they enlarge and thicken. Avoid making large cuts on thick branches, but cut away any upright shoots that sprout from wounds. If you leave them, they’ll suck energy from your tree’s flowers and fruits.
Step 8: Flag Weak Branches

Though water shoots are okay to remove in midsummer, it’s best to wait until late winter before making large cuts. You can, however, flag weak or unproductive limbs during the growing season. You won’t know which limbs grow the best flowers and fruits until the end of summer, and flagging helps you remember the weak ones.
As late winter approaches once again, you’ll take your sterilized tools back out and make proper cuts. With annual pruning, fruit trees excel in home orchards. Annual maintenance prevents weak wood, suckers, and water shoots. It also means you’ll have fewer overgrown specimens that need major pruning sessions!


