Broccoli Companion Plants To Consider
Finding the right broccoli companion plants can be tricky. We demystify the process and make it an easy process!

Contents
Broccoli is a delicious cool-season vegetable that many gardeners love to grow. Broccoli plants can become quite large, so broccoli companion plants are one of the best ways to maximize the space in your garden when you are planting broccoli for the season.
There are many types of broccoli, but the most common is the Calabrese variety, which is sold in stores. This is a heading variety, which can take up several feet of space in your garden. In fact, if you are growing in a raised bed or container, you will want to choose companion plants carefully so you can maximize your garden space.
Since broccoli has high nutrient and water needs, we are going to focus on companion planting that will work nicely with a very hungry and thirsty plant. Also, it’s great to keep in mind that members of the cabbage family tend to have a lot of pest pressure, so it’s important to be mindful of your companions when planting a brassica like broccoli in your garden.
Let’s jump in and learn what to companion plant with broccoli in the garden!
What Is Companion Planting?

Companion planting is a traditional style of planting a garden where plants are intentionally planted near others that will help them in some aspect. Although some companion planting guides can feel complicated with so many different plant relationships, there actually is science behind the method!
One reason why companion planting continues to be popular to this day is that it can attract beneficial insects for pollination, or distract insect pests with “trap crops” that are sacrificed to protect the main plant. Companion plants can also improve the taste of their neighbors through chemicals secreted in their roots.
Low-growing companion plants can serve as a living mulch, cool the soil, retain water, and smother weeds. They can also help make use of limited space by occupying vertical and horizontal space. In some cases, taller companion plants might be used to shade shorter heat-sensitive plants, and can also be used as a row marker so that you don’t overplant your garden or forget where something is planted.
In general, companion plants are a great way to maximize the space you are growing in and the quality of yields you get from your garden. Let’s learn about some of the best companion plants for broccoli!
Good Broccoli Companion Plants

Broccoli, or brassica oleracea var. italica, grows well with leafy greens such as lettuce, swiss chard, and spinach. Leafy greens like lettuce tend to grow low to the ground, while broccoli can become quite tall. Growing broccoli near leafy greens can help extend their growing season by providing shade to the soil, which can allow the greens to produce for a longer period of time before they bolt. Lettuce in particular grows best when shaded from the hot afternoon sun. Leafy greens also occupy space close to the ground, so they can cool the soil by shading it, prevent weeds from sprouting, and make use of otherwise open space. Leafy greens are a good companion crop to plant close to broccoli.
Successful companion planting can include aromatic herbs like rosemary, which can deter broccoli pests like cabbage loopers and cabbage moths with its strong smell. Herbs such as basil, mint, thyme, sage, and dill also have the same benefit as rosemary and can repel insect pests with their strong scent and flavor. The smell of strong aromatic herbs can even deter cabbage moths from laying their eggs on broccoli! Scented flowers like chamomile are good companions for broccoli because they attract beneficial insects, and are said to improve the flavor of broccoli.
Chamomile isn’t the only flower that makes a great companion to broccoli in the garden. Nasturtiums are good companions for broccoli because they form a living mulch. Since Nasturtiums have a sprawling growth habit, they will grow around the base of your broccoli plant and provide similar benefits to mulch. They are also light feeders, and won’t compete for nutrients with broccoli. Geraniums make great companions to plant near broccoli because they help deter cabbage worms and other pests that attack brassica plants.
Another reason for companion planting is to occupy empty space below the soil surface. Root crops like potatoes, beets, and radishes grow well with broccoli because they are a crop that has different nutritional requirements than broccoli. Their growth is under the soil, so it takes up a different space. Potatoes require soil rich in magnesium and phosphate, but broccoli needs calcium and nitrogen, so although both plants are heavy feeders, their different nutritional needs mean it’s possible for them to be grown close together. The same is true of broccoli and beets: broccoli pulls calcium from the soil, but beets prefer less calcium in the soil, so they make great companions. Radishes don’t take up much root space in the garden, and they thrive near broccoli in the shade it provides.
One family that grows well with broccoli is the allium family, which includes onions, shallots, and garlic. These plants include onions, which are said to improve the flavor of broccoli. Plants like shallots will also grow well with broccoli. Garlic is a great companion for broccoli because its strong scent can repel pests, much like the strongly scented herbs will. This helps to protect the plants from pests, and gives a good flavor to your broccoli plant.
If you want to get creative with your broccoli companion planting, you could try mixing celery plants with broccoli. Broccoli is said to have a better flavor when planted near celery, and the celery plant will grow better in the shade that broccoli casts. Just be careful to leave enough space for both plants, since they can grow quite large, and may end up competing for nutrients. Another great large companion for broccoli is rhubarb. Take care to not crowd either plant, since they will suffer if they do not have enough space, light, or nutrients to thrive. That said, rhubarb plants will deter the cabbage whitefly as well as other leaf-eating bugs, because its leaves are full of toxic oxalic acid.
Finally, cucumber plants can be planted with broccoli, but cucumbers are heavy feeders, so you might find that you will need to make sure your soil is amended with organic matter and fed frequently. Plant one cucumber near broccoli and be sure to give it plenty of space for growth.
What Not To Plant With Broccoli

Broccoli plants do not do well planted with the nightshade family because they are heavy feeders that compete for nutrients with broccoli. This includes peppers, tomatoes, and eggplants, which will all strip the soil of its nutrients. Tomatoes are especially nutrient hungry and make poor companions for broccoli. Keep your hot peppers planted far from your broccoli plants. In order to ensure proper growth, you should avoid planting near these nightshade plants.
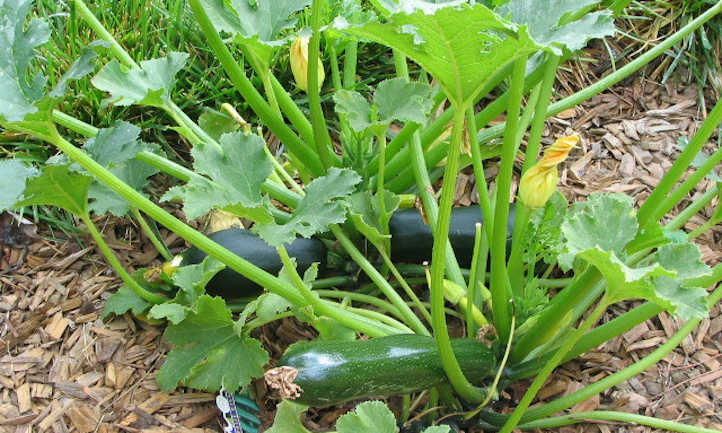
You should also avoid planting summer squash and winter squash, melons, and corn because these crops will use too many nutrients from the soil and compete with broccoli. For example, corn needs many soil amendments to grow well during the season. One squash plant could require a large amount of space and nutrients that will compete with your broccoli’s growth. Asparagus plants also need rich soil and will compete with broccoli for nutrients, resulting in both plants being stunted and not growing as well as they could alone. Strawberries are especially bad companions for broccoli because they are heavy feeders and are known to attract pests. It may be better to plant strawberries further away in the garden.
In particular, beans, including bush beans and pole beans, are bad companion plants for broccoli plants because they fix nitrogen in the soil and make it too rich for broccoli. This is the same for all members of the legume family because their nitrogen-fixing properties will overwhelm members of the cabbage family like broccoli with nitrogen-rich soil. Plants like beans should be spaced further away from broccoli in the garden.
Finally, it is best to avoid growing broccoli plants near other brassicas such as kale, cabbage, brussels sprouts, and cauliflower, because pests will quickly and easily infest plants in one family at once. By attracting pests that all feed on the same family of plants, you risk your broccoli being eaten by pests and attracting whiteflies, cabbage loopers, and cabbage moths to feast on your other brassica crops. For example, although brussels sprouts have the same nutritional requirements as broccoli, they can attract double the pest pressure to your garden. Keep brassicas spaced apart in the garden to avoid pests destroying the entire crop at once.
Frequently Asked Questions
Q: What can I plant with broccoli and cauliflower?
A: Plants such as leafy greens, strongly scented herbs, medicinal flowers, and potatoes!
Q: Are broccoli and carrots companion plants?
A: No, because carrots and broccoli will compete for calcium in the soil.


