How to Grow a Mango Tree From Seed
Have you dreamt of harvesting sweet tropical-tasting mangoes off a tree at home? If you live in a warm climate and have access to fresh fruit, you can do it easily. In this article, plant expert Matt Dursum covers how to grow a mango tree from seed.

Contents
There’s nothing like picking fresh mangoes off a tree. If you’re a gardener and live in zones 9 through 11, you can grow these fantastic trees in your garden. You can even grow them in containers indoors if you have enough room.
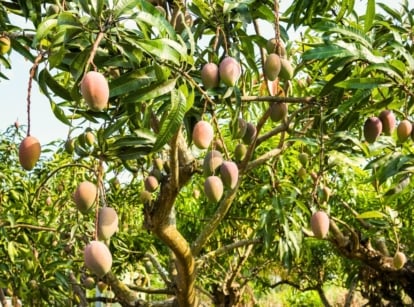
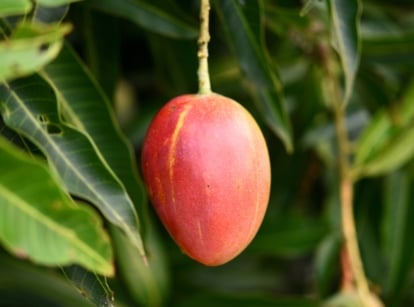
Mangoes are tropical evergreen fruit trees native to Central Asia. Over 1,000 varieties grow in gardens all over India. In the U.S., there are dozens of epic varieties, from the juicy ‘Glenn’ varieties to the sweet and sour ‘Kent’ varieties.
Although they can reach 100 feet tall, many gardeners grow them successfully in containers and greenhouses. You can grow these trees directly outside in places like South Florida, Southern California, and Hawaii.
Growing mangoes from grafts or young nursery seedlings is best for getting the characteristics you want. However, you can also grow mangoes from seed as a fun gardening project. Just be patient. It could take up to 5 or 8 years for your tree to produce fruit.
Whether growing outdoors or in containers, all you need is fresh fruit to start your trees from seed. Let’s dive in below to learn how to grow a mango tree from seed and what your mango tree needs to thrive.
Epic Grow Bags – Lined
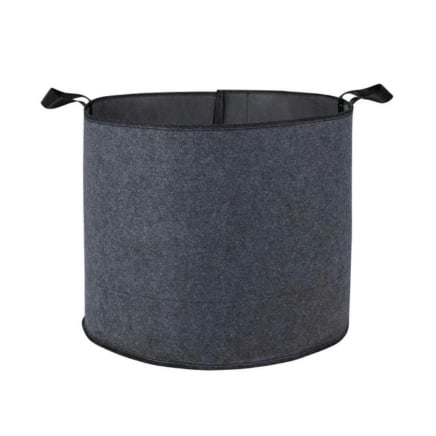
Our BPA-free grow bags are great for growers with small spaces. The unique liner system allows the soil to retain moisture while still encouraging air pruning, creating a denser, more fibrous rootball. Our lined grow bags are great throughout the hot, dry summer months when traditional unlined grow bags would dry out too quickly.
Step 1: Find a Suitable Location for Your Tree

Mango trees grown from seed will flourish in the ground or in containers. They need well-drained soil and full sun. They also need warm temperatures and consistent water.
If you live in zones 9 through 11, you can grow your tree directly outside. If not, you’ll have to use containers. Mangoes will survive brief moments of cold temperatures, but heavy freezes will wipe them out.
Find a container or section of your garden or yard with lots of room. Remember that an outdoor tree can reach up to 100 feet tall. Choose a space far away from other sun-loving plants and trees. Remember that you’ll have to grow your tree for over 5 years until you get fruit.
Step 2: Source Your Seeds

Now, the fun part! Find the juiciest and ripest mango you can and eat it. If you love the flavor, you’re on to something good. Better yet, you know the producer and the mother tree. If you don’t know anyone growing mangoes, you can try using store-bought fruit.
Select mango seeds that are white and firm, indicating that they’re ready to sprout and grow. If your seeds are brown, small, or shriveled, it’s best to toss them. They should feel heavy and solid and have a nice oblong or kidney shape.
Keep in mind that some varieties will grow true to seed while others will not. Try to find a variety that grows true to seed. These are polyembryonic varieties which have multiple embryos. If you know the mother tree’s variety already, you’re in luck. Otherwise, you’ll have to inspect some more.
Step 3: Inspect Your Seeds

If you’re not sure what kind of mangoes you have, open up their seeds to inspect them. To do this, carefully take a sharp knife or scissors and cut into the tough husk. Carefully pry the two sections apart, and you’ll see the seed inside.
Polyembryonic varieties will have multiple embryos making up the seed. You can see the creases separating them.
Monoembryonic seeds only have one embryo. There will be no creases or separate parts. These varieties won’t produce fruit like the parent trees, so it’s best to toss them.
The best way to cultivate monoembryonic trees is by grafting. To do this, you’ll have to have access to the mother tree and permission to make cuttings.
Step 4: Clean Your Seeds

Once you know you’re growing a polyembryonic mango, collect your fruit and eat your way down to the seed husks. Remove the husk and collect your seeds.
Carefully clean the papery film off your seeds. Check for signs of diseases or defects. Your seeds should be firm, white, and feel somewhat heavy.
Step 5: Soak Your Seeds

The next step is soaking your mango seeds in fresh water for around 24 hours to signal that it’s time for them to grow. This process rehydrates them and helps speed up their germination speeds.
After about 24 hours, remove your seeds from the water. They should feel clean and slightly slippery. Make sure all the film is removed and do one more quick inspection to see if they’re healthy.
Step 6: Wrap the Seeds in a Paper Towel

After soaking, take a few sheets of paper towels and moisten them. They should be moist but not soggy.
Place your seeds in each individual sheet and wrap them. The moist paper towels should completely encase them like a blanket on a cold winter night.
Step 7: Store the Seeds

After wrapping the seeds in moist paper towels, put them in a plastic bag and store them away in a warm place. Pick a spot that’s over 70°F (21°C) with no direct sunlight. A dark pantry or cupboard works fine.
Be careful not to expose them to the cold at this stage. They won’t germinate in cold temperatures.
Keep the paper towels moist by misting them with a spray bottle. Make sure you don’t overly soak them.
Step 8: Watch for Germination

It usually takes 1 to several weeks until you’ll see signs of germination. When mango seeds germinate, you’ll see tiny new growing tips sprout from the seeds.
The time it takes depends on the temperature and how ripe they were when you removed them from their husk. If your mangoes were sweet and juicy, they were probably ripe enough to germinate quickly.
Step 9: Prepare Your Beds or Containers

Prepare your beds or containers with well-drained potting soil. Use a mixture of potting soil and organic compost.
Mangoes thrive in slightly acidic soil between 5.5 and 7.5 pH. If you don’t know the pH of your soil, use a soil testing kit like this one to measure it.
If you’re using containers, start out with a medium-sized container or grow bag like this one with plenty of drainage holes. You can always transplant to a larger container once your plants mature.
Step 10: Plant Your Seedlings

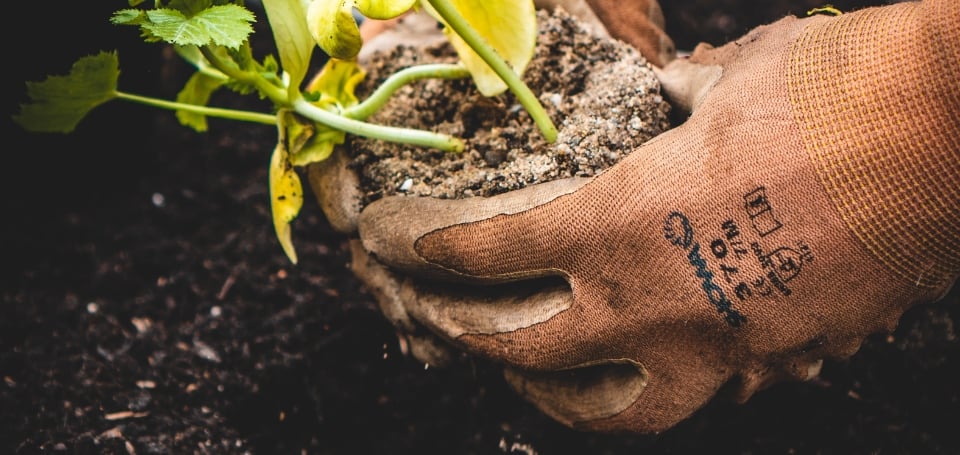
Once your young mangoes have germinated, it’s time to get them in the soil. Plant them directly in the soil, leaving their young leaves facing upwards.
Water them thoroughly until the soil is completely moist. Be careful not to overwater your seedlings or they could succumb to diseases.
Step 11: Monitor Your Young Trees

As your mangoes grow, give them consistent watering. These plants respond well to a wet/dry cycle of watering. This means watering until the soil is soaked and letting it go almost completely dry before watering again.
Try watering during the day to increase the humidity. These tropical trees love growing in humid environments.
Keep your seedlings in warm temperatures well above 40°F (4°C). If you’re planting them outdoors, get them in the ground by late spring or early summer. There should be no possibility of a freeze or light frost.
Step 12: Give Container-Grown Trees Enough Light

One of the biggest mistakes you can make when growing mangoes in containers is not giving them enough light. These plants need at least 8 hours of direct sunlight to flourish. They don’t do very well in low-light conditions.
Place your containers in front of a large, south-facing window. Or, if you have a greenhouse, even better. Mangoes love the warm, sun-soaked growing environment greenhouses provide.
Step 13: Skip the Fertilizer

As long as your growing medium is rich in organic material early on, you won’t have to fertilize yet. Wait until your young trees are over a year old before you start feeding them with an organic fertilizer in spring. Choose a plant food that’s low in nitrogen, such as a citrus blend.
These fruit trees are susceptible to fertilizer burn. If you suspect your young mangoes need a little extra nutrients, give them a light application of compost. Compost will infuse into the soil without shocking your plants.
Step 14: Watch for Pests and Diseases

Mango trees can be susceptible to pests such as mealybugs and aphids. These insects feed on the sweet sap and can introduce harmful diseases into your young trees.
Mites can also be a problem. These tiny pests are almost impossible to see with the naked eye. They feed on the foliage and can cause leaf drop if the infestation is extreme.
Watch out for powdery mildew and anthracnose infections. These fungal infections can damage plant tissue, flowers, and fruit.
The best way to prevent pests and diseases is by maintaining ideal growing conditions. Avoid overly saturating your soil with water. Develop a healthy ecosystem of beneficial insects and birds that prey on pests like aphids and mites.
Step 15: Protect Them From the Cold

As your mangoes grow, keep them away from the cold. Mature trees can handle temperatures just below freezing for a brief amount of time. However, young trees may show signs of severe shock after being exposed to temperatures below 40°F (4°C) for too long.
Bring container plants indoors if the temperature is predicted to drop. Protect outdoor trees with mulch and frost fabric around their base.
Key Takeaways
As you can see, growing mangoes from seed is easy. All you need are ripe polyembryonic mangoes and a few gardening tools.
Although grafting is the quickest way to get fruiting trees, it’s fun to try growing these tropical plants by seed. Give it a try and see if you can get healthy mango trees growing in your garden.

